Posts tagged ‘birthday’

Another year, another Zingerman’s birthday cake!

Ever since freshman year, my parents have sent me a Zingerman’s cake on my birthday.  The cakes are delicious and are decorated beautifully to look like wrapped gifts.

Thanks Mom & Dad!

Now that I’ve worked with fondant I am much more impressed with this decorating job. The fondant was rolled out perfectly to a thin layer.  I love how they made the bow!  The cake tasted amazing as well–it was chocolate cake with chocolate buttercream frosting.  DELISH!

Here I am, looking happy about turning 22 because I have thoughtful parents, a delicious birthday cake, and incredible friends who came all the way from Iowa City to celebrate my birthday with me.  Thanks to everyone who helped make my birthday so great!

November 16, 2009 at 10:50 pm 7 comments

Yo quiero taco cake

Last year for Sean’s birthday I made a Taco Cake.  You might be thinking, “uhhh what is that?!?” but it is exactly what it sounds like: a cake that is made to look like tacos.

bday11

For the taco shells, I baked yellow cakes in round pans and added some chocolate sprinkles to create the speckled effect.  The ground beef is crumbled chocolate cake.  It looks surprisingly real, doesn’t it?!

The next step is to add the toppings.  I used green food coloring to make the coconut look like shredded lettuce.  Next, I cut up circus peanut candies which are on my list of most bizarre candies.  I want to like them, but the taste is just a little different.  However, I had to sacrifice my own personal tastes here because they look remarkably like shredded cheese.  To top it all off, I used maraschino cherries to look like tomatoes.  And there you have it, last year’s Taco Cake!

You might be wondering if it tasted good.  I was first and foremost trying to make the cake actually resemble tacos, so I wasn’t too concerned with the taste.  However,  it turned out to be quite delicious in an unconventional way.  The circus peanuts weren’t too overpowering and the addition of a little “sour cream” (vanilla ice cream) was yummy as well!

October 25, 2009 at 10:53 pm 9 comments

Birthday Cake!

redstripecake2

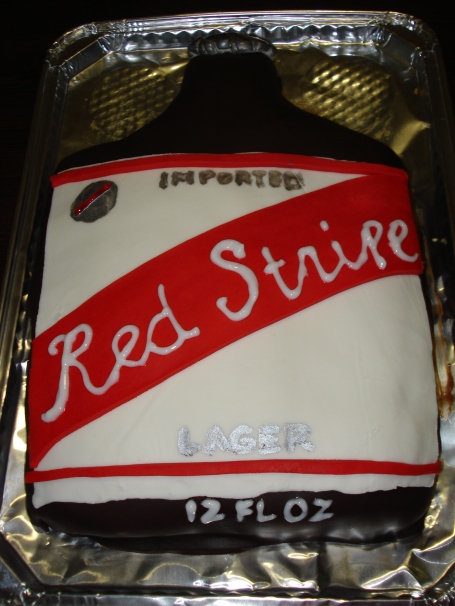
I just got back from a great weekend in the San Francisco Bay Area, where I helped Sean celebrate his birthday and enjoyed the amazing weather.  (Remind me again why I chose to go to school in frigid Michigan?!)  As for the birthday cake, drumroll please……… the winner is RED STRIPE CAKE!  Sean’s favorite beer is Red Stripe so the cake decision seemed quite obvious.  The cake itself was yellow cake with chocolate frosting topped with fondant.

First, I allowed the cake to cool completely and then cut it into a bottle shape.  From here, I frosted it with the chocolate frosting.  Generously, I must add.  YUM.  Next is the hard part, the fondant.  Because this was my first time using fondant I decided to buy it pre-made.   I used chocolate fondant to cover the entire cake.  Rolling the fondant was difficult so I enlisted the help of Sean’s roommate, Daniel.  Either I’m really weak or rolling fondant truly is a two-person job.  I bought a “fondant roller” which I would HIGHLY recommend getting.  The fondant must be super thin to spread over the cake so you have to roll it out completely and evenly.

From here, I draped the cake with the fondant and cute the edges around the cake.  The result is a perfectly smooth surface to decorate—just what I needed to make it look like a Red Stripe bottle!  I then cut out a square of the white fondant for the label.  The “red stripes” on the cake are pieces of red fondant.  I used red and white frosting along with silver luster dust to write on the cake.  The bottle cap is white fondant covered with silver luster dust.

All in all, I was really happy with how the cake turned out.  I had never used fondant before and it wasn’t as difficult as I thought it would be.  I will definitely be experimenting more with fondant and luster dust in the future!

Click here for more pictures!

October 19, 2009 at 8:47 pm 17 comments

Cakes for Geeks

I’ve been thinking about what kind of birthday cake I want to make for my boyfriend’s 23rd birthday this weekend.

In my research, I came across this blog about cake ideas for geeks: Geekcake.  I was laughing hysterically reading about how to make an “xkcd” cake (if you’re not familiar with the hilarious webcomic xkcd you should check it out).  Another of my favorites is this, the dice cake.  As the author of Geekcake writes, a geek will always have plenty of dice on-hand for whatever opportunity presents itself.  If you are a geek or are dating a geek, you know this is true!

This blog definitely has some great ideas about different themed cakes.  Try to make one for yourself or the geek in your life.  I will keep you posted about what I decide to make this weekend!

October 12, 2009 at 10:43 pm 9 comments

Best Chocolate Frosting. Ever.

updated cupcake

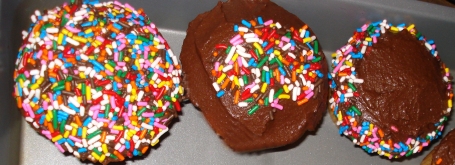
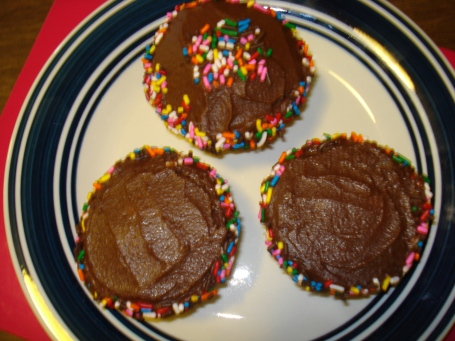
Yes, I am bragging about the chocolate frosting I made last week.  I made these cupcakes in honor of my dear friend Jenny’s 22nd birthday.  Happy birthday JCam!

The frosting was sweet and creamy without being so sweet that it hurt to eat.  Yes, believe it or not, I think some frostings are too sweet to be enjoyed.  To decorate, I put a generous amount of frosting on each cupcake and spread it out to the edges.  From here, just play around with rainbow sprinkles however you desire.  My favorite decor involves rolling the edge of the cupcake in the sprinkles.  Enjoy, decorating is the best part!  Well, besides eating of course.

Best Chocolate Frosting:

Adapted from Martha Stewart’s Everyday Food, June 2009.

Makes enough to frost ~24 cupcakes.

  • 2 cups confectioners’ sugar
  • 1/2 cup unsweetened cocoa powder
  • 1/2 tsp. salt
  • 1 cup butter (2 sticks), room temperature
  • 4 tbsp. whole milk
  • 1 tsp. pure vanilla extract

1. Whisk together confectioners’ sugar, cocoa, and salt.

2. In a large bowl, using an electric mixer, beat butter until light and fluffy. With mixer on low, gradually add cocoa mixture, scraping down side of bowl as necessary.

3. Gradually beat in milk and vanilla.  Beat frosting until light and fluffy, about 30 seconds.

4.  If you prefer a thicker frosting, continue to add confectioners’ sugar to your liking.  Add more milk if you prefer a thinner frosting.

unfrosted cupcakes

For the cake,  I made Martha Stewart’s  Yellow Buttermilk cupcakes.   They were also good but the frosting completely overshadowed the cake this time.  Warning:  Be very careful not to overcook these or they will be dry…and nobody likes a dry cupcake!

Yellow Buttermilk Cupcakes

Adapted from Martha Stewart Cupcakes

Yield: According to Martha, it makes 36.  I got about 30 regular-sized cupcakes.

  • 3 cups cake flour (not self-rising)
  • 1 1/2 cups all-purpose flour
  • 3/4 teaspoon baking soda
  • 2 1/4 teaspoons baking powder
  • 1 1/2 teaspoons coarse salt
  • 1 cup plus 2 tablespoons (2 1/4 sticks) unsalted butter, room temperature
  • 2 1/4 cups sugar
  • 5 large whole eggs plus 3 egg yolks, room temperature
  • 2 cups buttermilk, room temperature
  • 2 teaspoons pure vanilla extract

1) Preheat oven to 350 degrees.  Line cupcake pans with paper liners.  Sift together both flours, baking soda, baking powder, and salt.

2)  Using an electric mixer on medium-high speed, cream butter and sugar until light and fluffy.  Reduce speed to medium and add whole eggs, one at a time, beating until each is incorporated, scraping down sides of bowl as needed.

3) Add yolks, and beat until thoroughly combined.  Reduce speed to low. Add flour mixture in three batches, alternating with two additions of buttermilk, and beating until combined after each.  Beat in vanilla.  Be careful not to over-mix or the cupcakes will be tough and bread-like instead of light and airy.

4)  Fill each cupcake liner 3/4 full.  Bake, rotating tins halfway through, until cupcakes spring back when lightly touched and toothpicks inserted in centers comes out clean, about 20 minutes. Transfer tins to wire racks to cool 10 minutes; turn out cupcakes onto racks and let cool completely. Cupcakes can be stored overnight at room temperature (or frozen up to 2 months) in airtight containers.

cupcakes1

DSC01787

October 3, 2009 at 9:13 pm 14 comments


  • 55,468 hits